How to Make DIY Dining Chair Seat Pads
Making your own dining chair seat pad – ideal for chairs that are a little too firm – is a great project for anyone new to upholstery. Whether square, rectangular or small and circular, these pads are typically two to three inches deep and attach to the chair with two single ties at one corner. They are most common on wooden patio furniture, but are equally good for dining, study, office or writing-table chairs.
These pads can be made with medium-density or high-density foam, or a mix of two foam sheets for a medium-firm cushion. At eFoam, we supply high-quality, low-cost upholstery foam that is perfect for this, available cut to any size or shape. If you'd like help choosing a density, see our seat foam buyer's guide.
What you'll need
The standard size for a dining seat pad is 38cm by 38cm, typically two or three inches deep. To make one you'll need:
- Roughly a metre squared of your chosen cover fabric
- Ribbon or trim for the ties
- A button kit
- A small zip
- Some batting for extra cushioning
- A stockinette to wrap your foam insert
- Your usual sewing materials
How to make the seat pad
Once you have ordered your foam insert using our cut to size tool:
- Cut two pieces of fabric one and a half inches larger all round than your foam insert.
- Stack the two pieces together and cut the bottom edge so the corners are rounded.
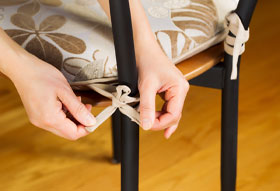
- Pin your ties between the two pieces, with the right sides together and the ties facing in towards the centre of the cushion.
- Sew two ties on one edge and two on the other. This edge becomes the rear of the cushion that attaches to the chair.
- Sew all the pieces together, including the tie side, but keep the front edge open, and stitch a zip onto that open edge.
- Wrap the foam insert in your stockinette and slide it into the cover, add some batting on the top side for extra plushness, then stitch the cushion shut.
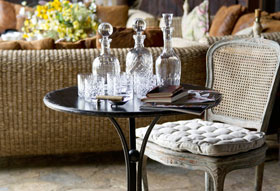
How to add a tufted button effect
- Pass your thread through a button on the underside of the cushion and pull it through to the top side.
- Add your top-side button and repeat the stitches several times, then pull the thread tight to create a puckered effect.
- Leave a little give in the thread.
- Repeat for as many buttons as you want on your cushion.
For help with any DIY or upholstery project, please contact us. You can also take a look at our upholstery foam craft project blog.
Frequently asked questions
What foam should I use for a dining chair seat pad?
Dining chair seat pads can be made with medium-density or high-density polyurethane foam, or a mix of two foam sheets for a medium-firm feel. eFoam supplies upholstery foam cut to any size or shape.
What size is a standard dining seat pad?
A standard dining seat pad is about 38cm by 38cm, and typically two to three inches deep, depending on preference.
Is making your own dining seat pads a good beginner project?
Yes. Making a simple square, rectangular or round seat pad is a great first upholstery project, and the foam can be ordered cut to size so you only need to sew the cover.