





How to Make a Portable Foam Sound Isolation Shield
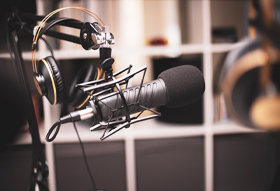
Working from home has thrown up challenges for those used to an office or studio. From customer-service agents to podcast hosts and broadcasters, we've all had to adapt – and anyone needing a specialist environment for their equipment has had to get creative.
Many of these solutions have been shared on social media. Radio broadcasters recording news segments from home, without proper soundproofing, have resorted to recording close to the microphone with a bath towel over their head to reduce echo. That isn't practical and doesn't deliver the quality needed for professional broadcasting or podcasting.
There are many permanent soundproofing solutions, but they take considerable time and investment. For those planning to return to an office or studio, or working in communal areas like a kitchen or living room where on-wall panels wouldn't suit, a permanent install is unnecessary. Instead, there's a simple portable solution you can make quickly with cost-efficient materials from eFoam.
What you need
All it takes is three foam panels in an acoustic foam grade. The size depends on your setup. If you sit at a dining table with a microphone in front of you and don't record elsewhere, three panels 45cm high by 30cm wide work well. Most importantly, make sure the panel height is greater than the height of your microphone on the desk, or the shield won't be effective.
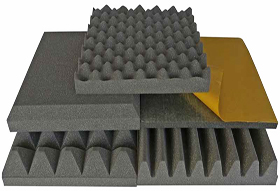
How to make a portable shield
For a more portable shield that folds up and travels anywhere, choose three panels cut to size at roughly 30cm high by 20cm wide. This makes a smaller enclosure when folded out into a semi-circle, but still gives a substantial recording experience. For best results, keep your face directly in line with the height of the microphone when recording.
Secure the three panels with four lightweight plastic hinges from any DIY store – do not use metal hinges, as they're too heavy for foam. Space them so the three panels fold on top of each other when packed away, which may mean using extended plastic hinges. To keep the bottom of the shield in place, use adhesive to attach several small gripper mats along one of the bottom edges.
To read more on acoustic soundproofing, see our guide to installing acoustic foam. Otherwise, please contact our friendly advisers with any questions.
Frequently asked questions
What foam do I need for a sound isolation shield?
You need an acoustic foam grade. The panels should be taller than your microphone on the desk, otherwise the shield won't effectively reduce echo around it.
What size should the panels be?
For a fixed desk setup, around 45cm high by 30cm wide works well. For a portable shield that folds up for transport, around 30cm high by 20cm wide creates a smaller but still effective enclosure.
How do I connect the panels together?
Join the three panels with four lightweight plastic hinges – never metal, which is too heavy for foam – spaced so they fold flat, and add small gripper mats along one bottom edge to keep the shield steady.