How to Paint Foam
Foam is popular for costumes, props and other DIY crafts. Although it's available in a number of colours, the options often depend on the foam type – high-firm polyurethane, for example, is often only available in pale blue, and medium-density polyurethane in pale green, though this varies by manufacturer.
Why paint foam?
Searching the whole market for foam that matches your exact colour is a tiresome task, so painting your chosen foam is a good alternative – with some considerations: preparation, the type of paint, and whether the foam will show the effect you want. It may be hard to paint black foam a light pale colour, for instance. Whether foam is suitable for painting also depends on its use, but for a costume or item not exposed to water or the elements, you should be fine to proceed.
What kind of paint can you use on foam?
Given the textured nature of polyurethane foam, you might think to spray paint your item. However, only closed-cell polyethylene foam should be spray-painted, as open-cell foams tend to melt under the pressure and composition of some aerosols. A more straightforward option is to smooth, seal and prime your item first – given its soft, porous nature, open-cell foam must be sealed before painting.
How do you seal foam before painting?
Shape and clean the foam of any debris or dust, patch any voids, then brush or roll on two or three very light coats of a foam-safe, water-based sealer such as diluted PVA glue, acrylic gesso or polycrylic, letting each coat dry fully and scuff-sanding between coats.
Step-by-step
- Assess the foam for irregularities or stray pieces (known as "flash"). Sand it down and slice off any extra with a craft knife for a smooth surface – it's far easier to prepare well than to correct after painting.
- Seal the foam with an easy mix of white glue and water brushed on. This is mainly for open-cell foam, so you may skip it for closed-cell, though an acetone-based primer gives closed-cell foam the best finish.
- Once the primer is dry, paint with acrylic or oil-based paint. For a bold single colour, build a base coat then second and third coats, using several thin coats rather than one heavy one to keep the texture and control the result.

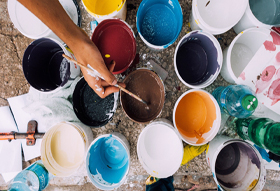
For many cosplay costume and prop makers, the design is in the detail. To achieve a specialist look or texture, consider a paint wash – a mix of water and your original paint brushed over the item. Our talented customer Pippy used this method for her foam costumes, as shown in the photo, which is useful for a worn look or for recreating stones or certain fabrics. For more, see our guides to cutting closed-cell foam and foam for cosplay.
For advice on using and preparing foam for costume and prop making, please contact us.