How to Make DIY Foam Puzzles

The number of us getting involved with DIY projects is on the rise, big and small, and DIY and arts and crafts projects are popular with both parents and children.
As foam is incredibly versatile, it suits a range of children's crafts. It's a useful component in felt crafting, but it can also be an easy crafting material in itself. A popular activity for parents and children is making foam-based puzzles, in 3D block shapes or 2D flat pieces, typically as a home or garden activity.
Making a busy-bag foam puzzle
For a puzzle to keep a young child entertained on the go, consider a small 2D "busy bag" puzzle, light and compact enough to fit inside a small zip bag. Plastazote closed-cell polyethylene foam is ideal here, being lightweight, waterproof and available in bright colours. To keep it compact, we'd recommend a 10-15mm sheet – slightly thicker also makes it easier for little hands to grasp:
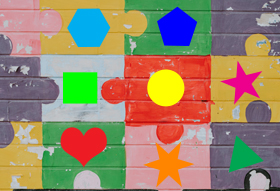
- Draw several shapes on your foam sheet with a pencil – circles, squares, rectangles, triangles and stars are popular and easy.
- Using a small scalpel or craft knife, trace over the markings to cut out each shape so it pops out of the sheet.
- Mark a straight line down the middle of each shape to keep your cutting symmetrical, then cut along it to split each shape in half.
- Decorate with water-based craft paint – let children run wild, or encourage them to paint both halves of each shape the same colour to help with matching later.
Once the pieces have dried, pop them into a simple zip-top bag. To make your own, take two pieces of material about double the width of two puzzle shapes side by side and one and a half pieces tall, stitch a zip to one long edge of both (remembering the bag will be turned inside out), then stitch the remaining edges, turn it the right way out and decorate. For more ideas, see our guides to educational foam toys and foam crafting stamps.
Frequently asked questions
What foam is best for a DIY puzzle?
Plastazote closed-cell polyethylene foam is ideal, being lightweight, waterproof and available in an array of bright colours. A sheet around 10-15mm thick keeps the puzzle compact while being easy for small hands to hold.
How do you make a foam busy-bag puzzle?
Draw shapes on a foam sheet, cut them out, split each shape in half, then decorate with water-based paint. Once dry, store the pieces in a simple zip-top bag so the puzzle is easy to carry.
Is foam safe for children's puzzles?
Foam puzzles are lightweight, washable and made from non-toxic foam. Slightly thicker pieces are also easier for little hands to grasp, making them a good home or on-the-go activity.