How to Restuff and Revitalise Old Toys
For some, parting with a long-cherished toy is unthinkable. Whether it's a treasured gift or a family heirloom, even with the utmost care stuffed toys eventually need restoration. Professional restoration isn't cheap, though, so many prefer to take repair and rejuvenation into their own hands.
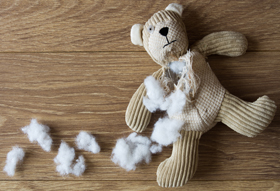
One of the most common problems with vintage stuffed toys is a loss of fullness. Common stuffing materials include synthetic fibre, wood wool, cotton, straw and beans, whereas most modern toys use polyester filling designed to help a plush toy keep its shape. With older toys, the different inner materials mean the effect isn't quite the same. So how do you best restore a vintage stuffed toy?

Remove the inner materials
The first step is finding an appropriate point to unstitch the toy. For vintage teddy bears, this is usually the central seam down the back. For other shapes, find a fairly hidden seam, but make sure you can efficiently remove and insert the inner material throughout the whole toy from that single opening. Once you've found it, remove as much stuffing as possible.
Cleaning
Removing the stuffing is the perfect chance to give the toy a thorough clean, a good idea given the years of dust and dirt a vintage toy may have accumulated. Pre-treat stains with a gentle remover and blot with a sponge, then remove any accessories, clothes and sound boxes and place the toy in a white pillowcase, tying it securely to protect features such as plastic eyes. Wash on a gentle, low-temperature cycle, adding a little fabric conditioner to the rinse for a soft, fluffy finish, then leave to dry for a day or two (depending on size and thickness), out of direct sunlight.
Preparing your foam stuffing
One of the most versatile materials, foam can refill stuffed toys, even the strangest shapes. We supply foam offcuts that break down easily into tiny pieces for craft use, or, if you only need a little, reconstituted chipped foam that can be cut into crumb-like pieces. Start with the trickiest areas – for a teddy bear, the ears, then the arms and legs – compacting the foam to your desired firmness, before filling the body. Don't overfill the body, as you'll need enough give to re-stitch the toy. For more ideas, see our guides to reusing old foam and educational foam toys.
For help using foam to rejuvenate an old toy or soft furnishing, call one of our friendly advisers on 0800 043 9990 or contact us.
Frequently asked questions
How do you restuff an old soft toy?
Unstitch a hidden seam, remove the old stuffing, give the toy a clean, then refill with foam – starting with the trickiest areas like the ears before the body – and re-stitch. Don't overfill, so there's enough give to close it up.
What can you use to restuff a teddy bear?
Foam works well even for awkward shapes. eFoam offcuts can be broken down into tiny pieces, or for smaller amounts, reconstituted chipped foam can be cut into crumb-like pieces for filling.
How do you clean a vintage stuffed toy?
Pre-treat stains and blot gently, remove accessories and sound boxes, place the toy in a tied white pillowcase to protect features like plastic eyes, and wash on a gentle, low-temperature cycle with a little conditioner before air-drying out of sunlight.